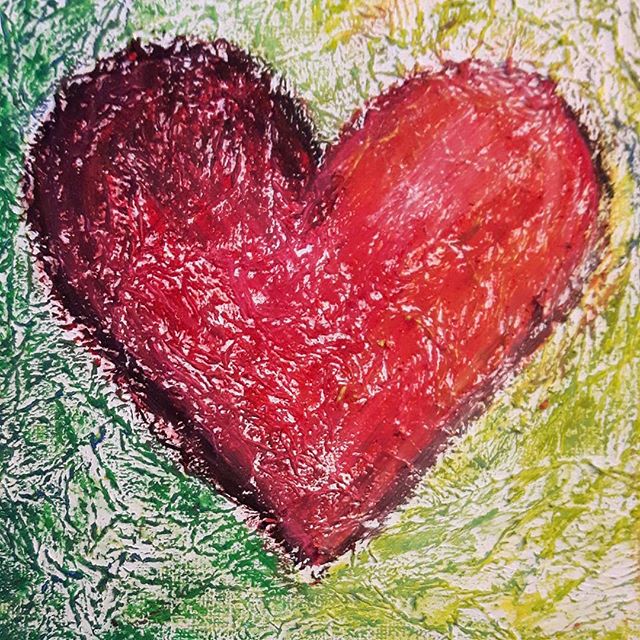
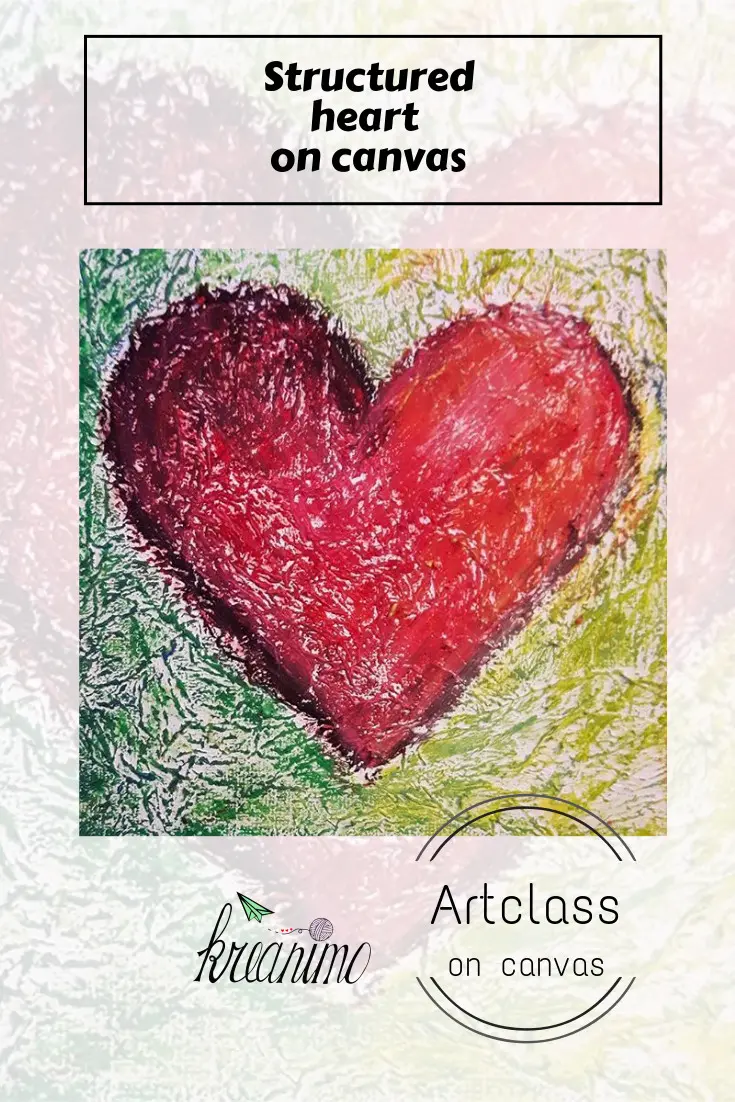
Hello everybody! Ready for yet again a super easy DIY project with great result? Here we go! Let’s make a structured heart on canvas!
Contrast on a canvas
The great thing about this DIY project is that it just can’t go wrong! It’s so easy and it looks so ‘artsy’! 😉
That’s why I love doing this project in artclass too, because it will certainly make the children proud! And that’s so important, don’t you agree,
You can do this project for Valentines day or just when you want to teach them about contrast. I used complimentary contrast in this project!
Structured heart on canvas:
supplies for your structured heart on canvas:
(little) square canvas
gesso
box of tissues
brush
oil pastels
Step by step your structured heart on canvas:
put some gesso on your canvas.
glue the tissue papers on the canvas using the wet gesso! Be sure to make some structure!
don’t forget to paint over the tissue paper too.
let the canvas with the gesso and the tissue paper dry
color the background with yellow oil pastels
draw a red heart on the canvas
color the background with greens. Use blue and yellow to make other tints of green if you want to.
trace the heart with a black oil pastel
add a little white and pink if you want to. werk af met roze en wit oliekrijt
finished!
I really hope you liked this super easy DIY on canvas! If you make one of your own, please let me know, so I can come and take a look at it!
If you use it in class, let me know too! It works really well, I promise.
You don’t have to use red and green.
I think baby blue and pink will do great in nursery for example!
Bye for now!
Take care and see you all soon!
ps: have you ever painted with silk paper on canvas? That works great too! –> click here
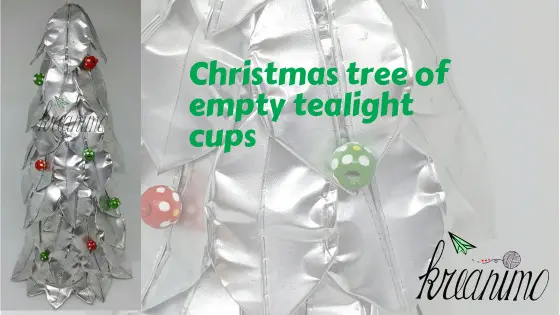
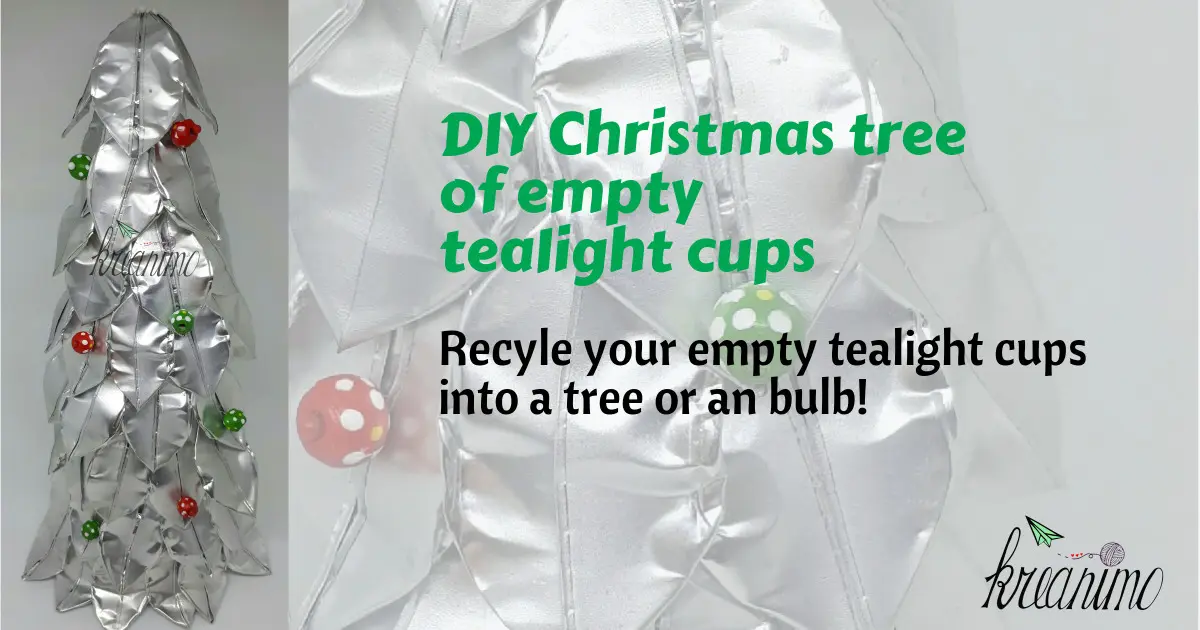
I’m one of those people who likes to burn candles to get a cosy feeling in the house. Scented ones or tealights in lovely holders. Sometimes I use those LED lights, the ones that are safer when you’ve got kids in the house. But most of the time I go for the real thing. And when you burn a lot of those little candles you get a lot of empty cups too. Years ago I learned that you can use these to make decorations. Today I’ll show you how to make a christmas tree out of empty tealight cups.
Supplies for a Christmas tree out of empty tealight
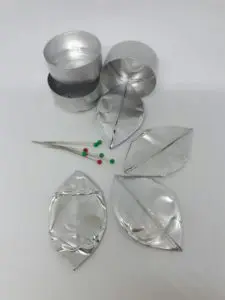
A lot of empty tealight cups. Not all the cups will turn out as nice when you flatten them. I wish I would have had some more so I could have chosen what ‘leaves’ turned out the best for my tree. But I still have some time left to burn some more candles and change the leaves I don’t like.
A pepper foam cone
pins
pearls or other things to decorate your tree.
Step by step Christmas tree out of empty tealight cups
make leaves by folding two opposite sides of the empty cup to the inside. Flatten the leaves as much as possible. Select the most beautiful ones if you have enough of them.
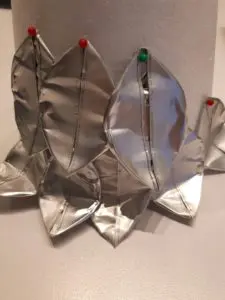
start pinning the leaves at the bottom of the cone. Fold the leaves to so they don’t show the white cone.
the second row has to be pinned like roofing pavement. The point of the leaf pointing down should come on top of the overlap of two leaves of the first (or previous) row. (see picture)
Go on like this until your cone is full. On the top I used white pins. For the other leaves the color doesn’t matter because the heads of the pins don’t show.
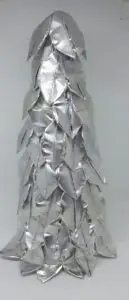
5. Decorate your tree with pearls or other decorations and give your tree a nice spot in the house!
Pin this Christmas tree out of empty tealight holders for later:
Crea-cross – creative linkparty
This week the linkparty crea-cross has the prompt ‘fire’. Empty tealight cups fit that prompt, don’t they! 😉
If you have nice creative links to add, please do! you can use the blue button!
Take care and see you soon
Ilse
[inlinkz_linkup id=748463 mode=1]
Paint with silk paper DIY – step by step instructions for all ages
Did you know that you can paint with silk paper? Not as accurate as when you would use a brush and paint, but it does work. The paper and the colors often have a will of their own, but that makes it exciting for the artists.
How to paint with silk paper on canvas
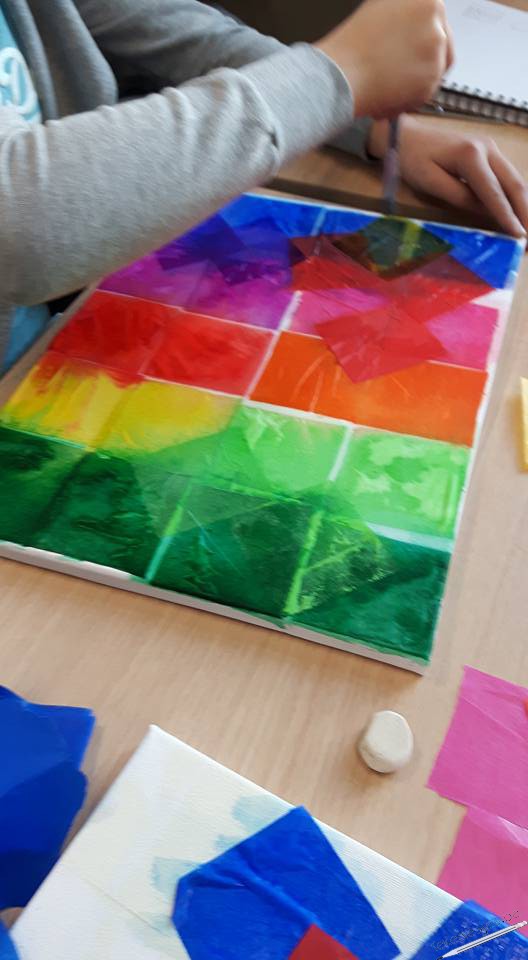
Sometimes art projects go totally different in class than you intended. My eight graders were supposed to use this ‘paint with silk paper’ technique to make a background on their canvas to paint over. But when they were done they didn’t want to paint anything over them!
“No, Miss! What if we paint over it totally messes things up?” – They loved the results very much!
And sometimes a good teacher has to listen tot her pupils! We decided to leave them just the way they were!
What do you need to paint with silk paper on canvas?
a canvas (duh 😉 )
water
brushes
silk paper in different colors
scissors
old newspapers or other protection for your table
protection for your clothes and if you want platic gloves for your hands.
How to paint with silk paper step by step
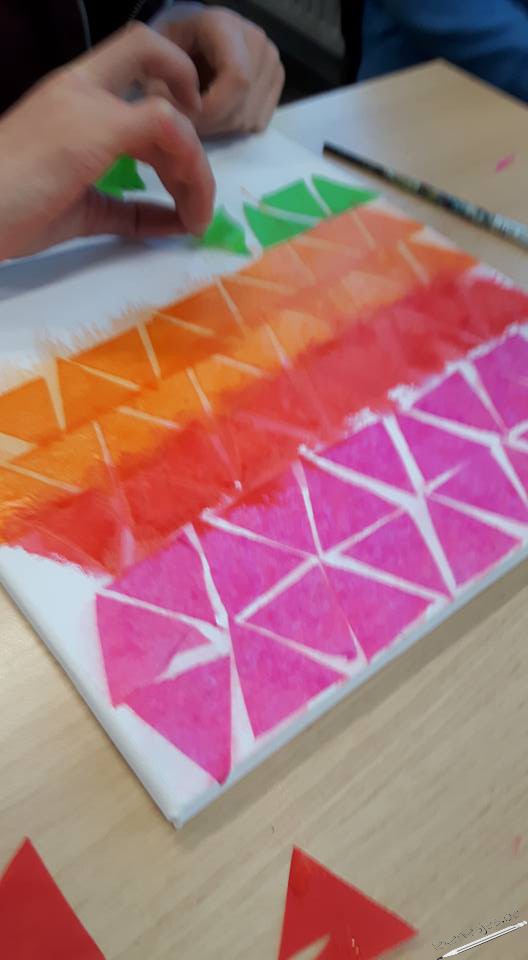
Chose the colors you want to use. Think of a pattern, that makes it easier!
Cut out the shape(s) you want to use in diferent colors.
‘glue’ the pieces on the canvas, using only water! This way, when the the pieces of silk dry, you can just swipe them off. The color will stick on the canvas.
You can mix colors by ‘gluing’ different colors on top of each other.
Let the ‘painting’ dry. Make sure to protect the spot you let the canvas dry! The pigment on the paper is a killer for untreated wood. Your hands will need a good saok!
Watch out!
as I said silk paper, when wet, will get color everywhere! Protect your works space, drying space, clothes and hands!
When dry little pieces of silk paper will fall off the canvas when you walk by because they are very light! So best you put it in a space where you don’t walk by it every 5 minutes if you don’t want to be pick up lots of pieces of paper! 😉
Paintining with silk paper is ideal to use in projects about shapes and color and even patterns.
The result will be surprising every time!
Little children can do this already, but the older ones will enjoy it too because of the surprise effect it brings!
I still think it will work well as a background too!
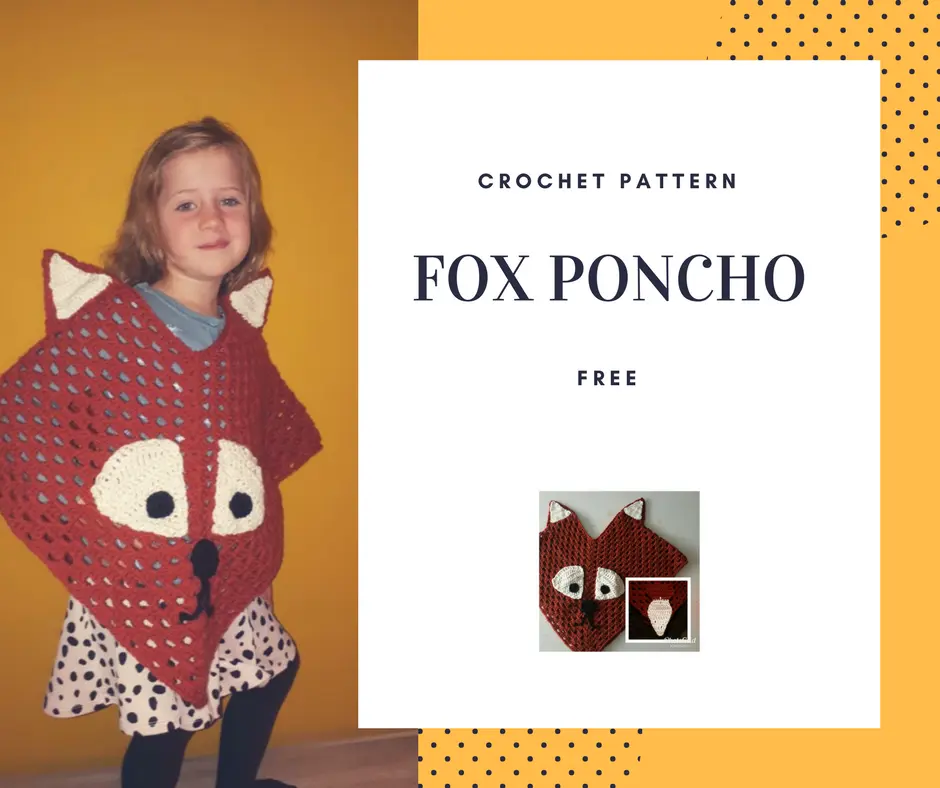
Sometimes an idea pops into my head and I just have to start crocheting! This is what happened when I took al look at the poncho of my daughter. I noticed the shape of it looked like a fox head! So I got the idea to turn the poncho into a fox poncho.
I wrote the pattern down for all of you! Happy crocheting!
Materials (5 year old size 116)
Lana Red ochre (for hook size 6.5) – Wool en acrylic – 250 g/450 m. This was a very larg skein, so one was enough
Lana ecru
Leftover black yarn for hook size 4
Hook size 5.5
Hook size 3
Needle
Scissors
Pattern fox poncho
Basic poncho (with hook size 5,5)
Crochet a chain of 72. (or a muliple of 8 that fits)
Close the chain with with a slip stitch. Be careful that the chain is not turned.
Sc in every ch (72)
Start the granny stitch
Granny stitch = 3 dc, 1 ch (skip one)
Put a stitch marker in st 18 and 56 – you are going to increase in every row in these stitches.
Go around with the granny stitch.
Keep going until your poncho has the right length – end with a slip stitch.
fasten off
White parts
(Crochet 2 with hoog size 5.5)
Ch 4, 1dc in 1 st ch. – turn
2dc – 2 dc (4dc) – turn
2 dc in 1st st – 2 dc – 2dc in last st (6dc) – turn
2 dc in 1st st – 4 dc – 2dc in last st (8dc) – turn
2 dc in 1st st – 6 dc – 2dc in last st (10dc) – turn
2 dc in 1st st – 10 dc – 2dc in last st (12dc) – turn
2 dc in 1st st – 12 dc – 2dc in last st (16dc) – turn
1 sl st – 1 sc – 1 hdc – 2 dc – 2 tr – 2dtr -2tr -2dc- 1hdc- 1 sc – 1 sl st (16 st)
fasten off
Nose for fox poncho
(hooksize 5,5)
8 sc in ml
2 dc in every sc (16)
2 dc in 1st st, 7 dc, 2 dc in last st. (18)
fasten off
eyes Fox poncho
Hooksize 3 – black yarn
8 sc in ml
2sc in every sc (16)
fasten off
Mouth fox poncho
Ch 25 – fasten off
Ear Fox Poncho
Crochet 2 in orange/red yarn (hooksize 5,5)
Crochet 2 in white (hooksize 3)
ch 2
1 sc in 2nd loop from the hook – turn
2 sc in sc – turn
2 sc in every sc (4)
2 sc in 1st st – 2 sc – 2 sc in last st (6) turn
2 sc in 1st st – 4 sc – 2 sc in last st (8) turn
2 sc in 1st st – 6 sc – 2 sc in last st (10) turn
2 sc in 1st st – 8 sc – 2 sc in last st (12) turn
3 sc in 1st st – 10 sc – 3 sc in last st (15)
Fasten off
Tail fox poncho
Start with orange/red in hooksize 5,5 – every row has a ch to turn.
Ch 14
1 dc in 2nd st from the hook – 1 dc in every next st (13) turn
crochet 4 rows of 13 st
dc2tog- 9 dc – dc2tog (11)
dc2tog – 7 dc -dc2tog (9)
dc2tog – 5 dc – dc2tog (7)
change to white yarn
2dc in 1st st – 5 dc – 2dc in last st (9)
2dc in 1st st- 7 dc – 2 2c in last st (11)
dc2tog – 7 dc – dc2tog (9)
dc2tog – 5dc – dc2tog (7)
dc2tog – 3dc – dc2tog (5)
dc2tog – 1dc – dc2tog (3)
dc3tog
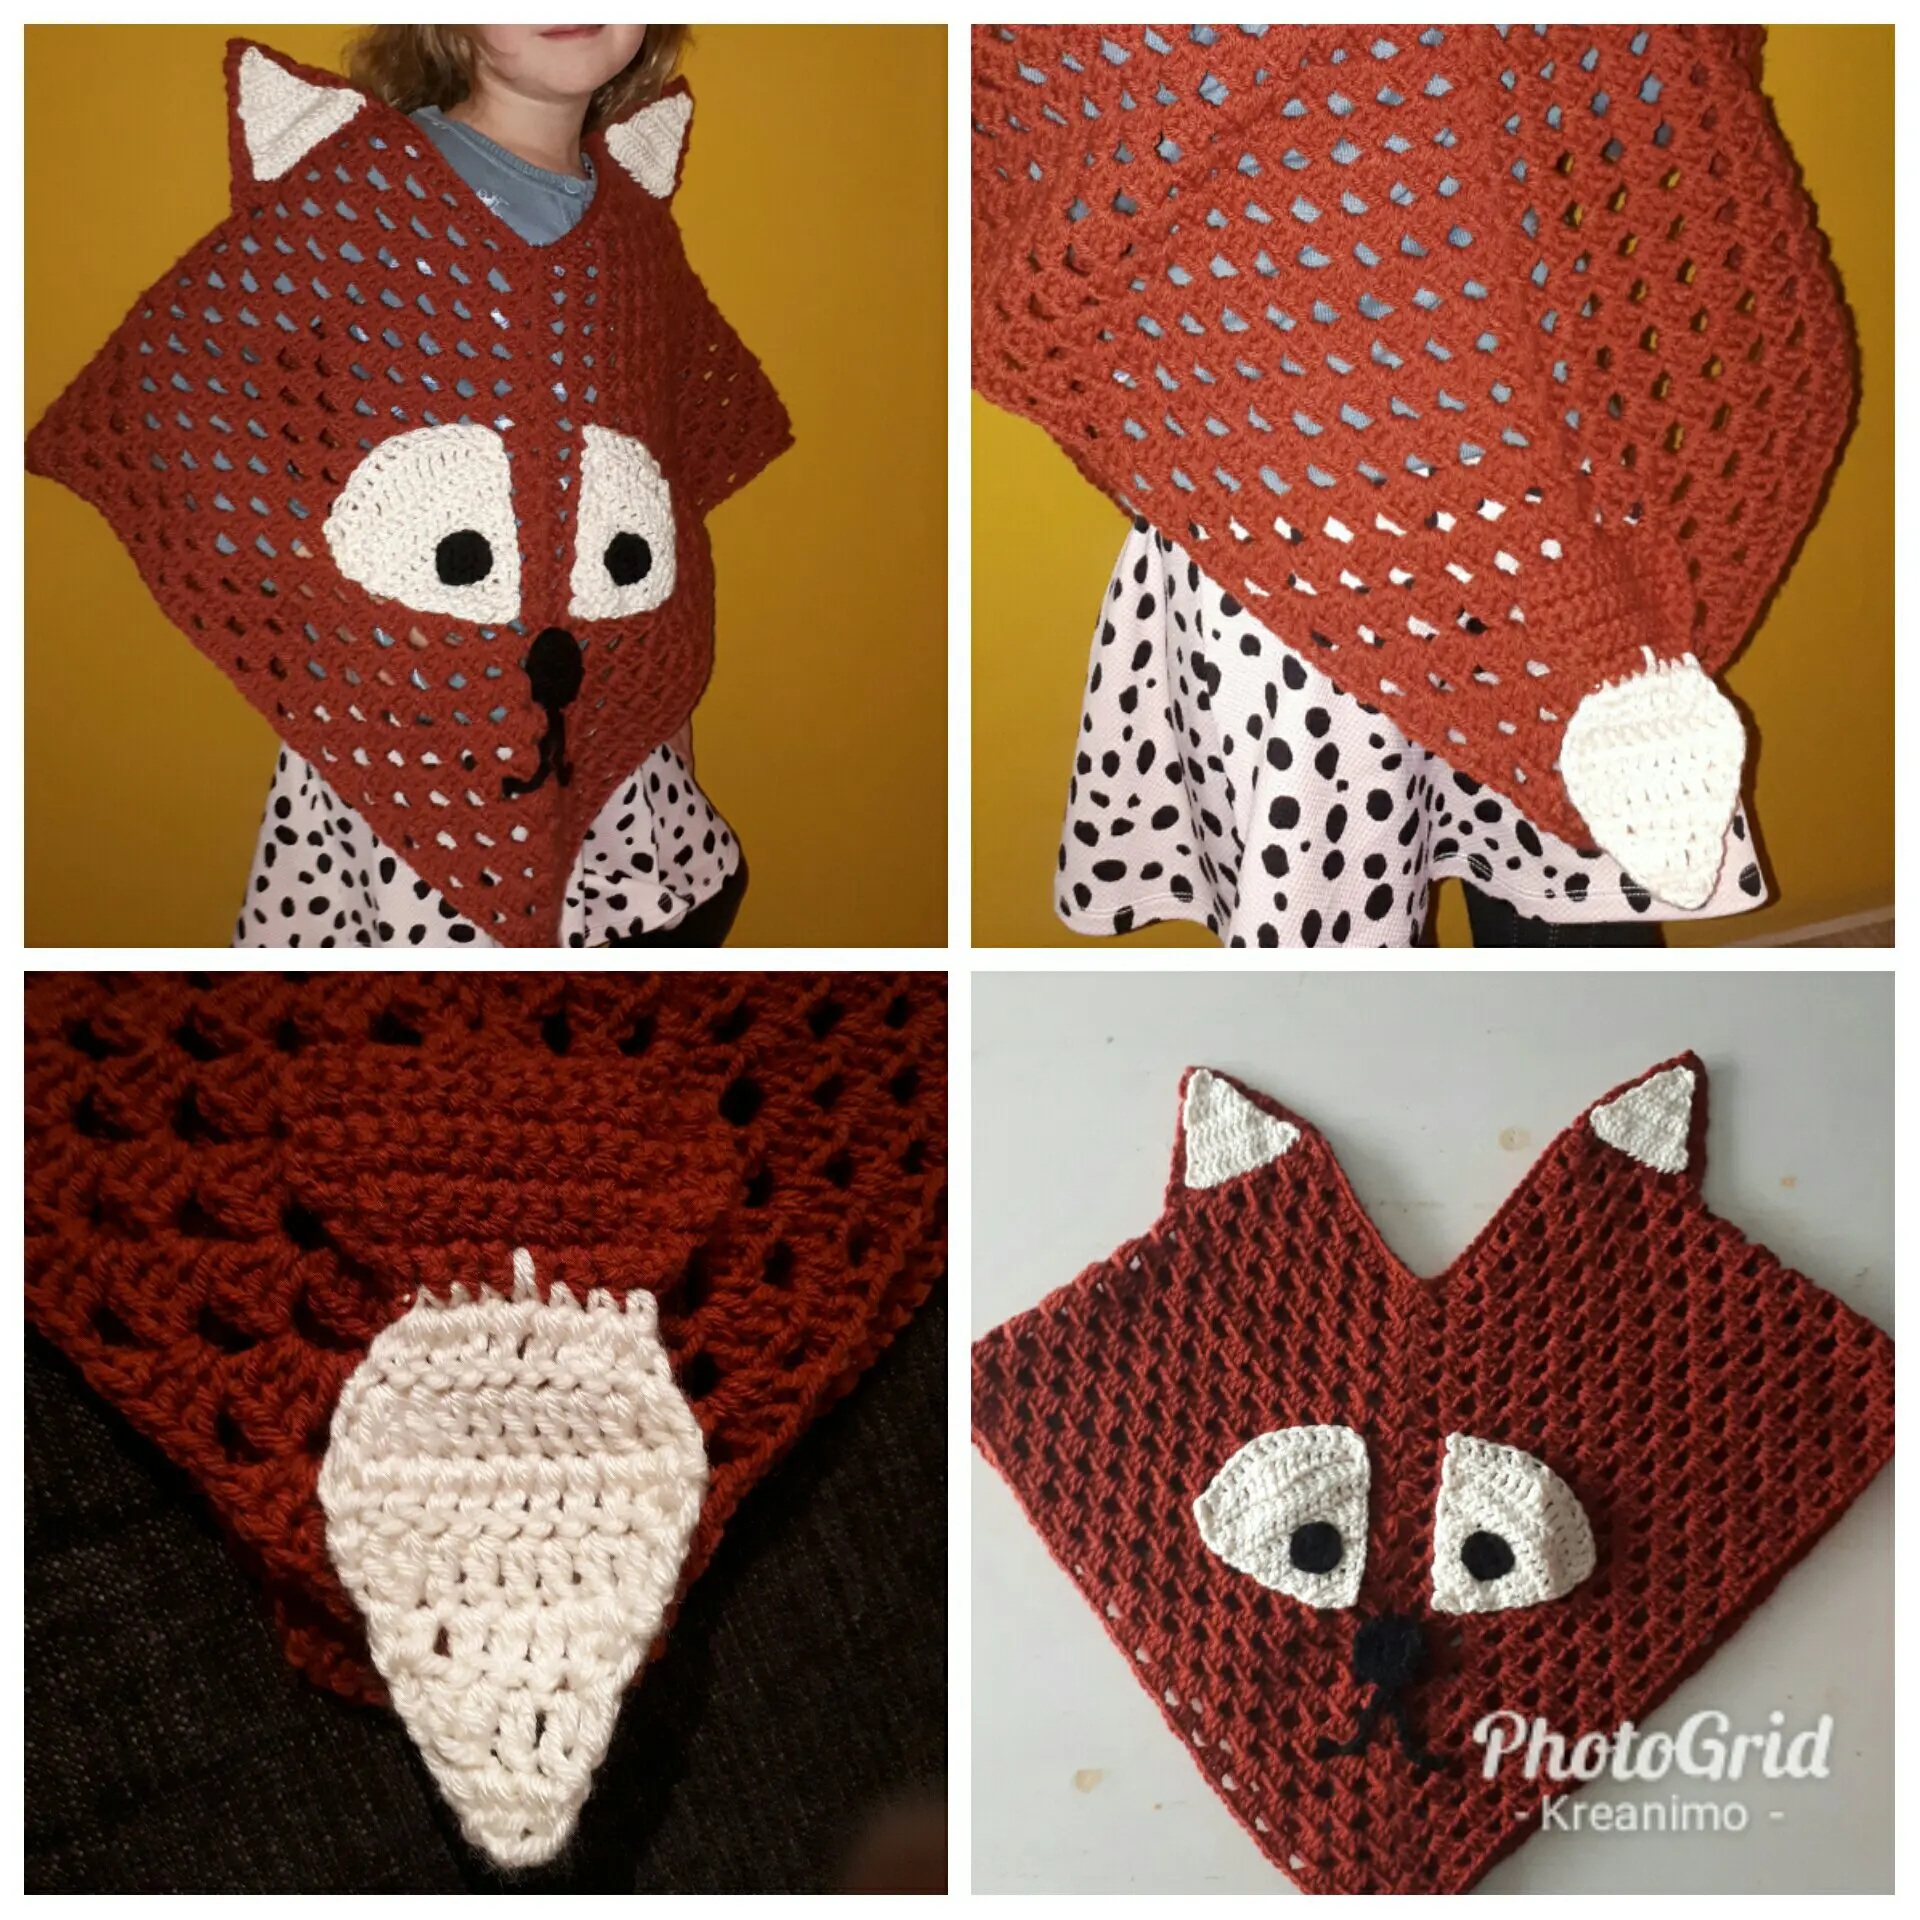
Put the poncho together:
Put the eyes on the 2 white pieces.
Put the 2 white parts on the front of the poncho so it looks like a nose bridge.
Put the nose between the two tips of the white parts.
The chain for the mouth should have the middle part against the nose.
Sow the white ear part on the brown – Sow them both on the shoulders of the poncho.
Sow the tail on the back of the poncho? make sure the tail doesn’t stick out too much.
Ready!
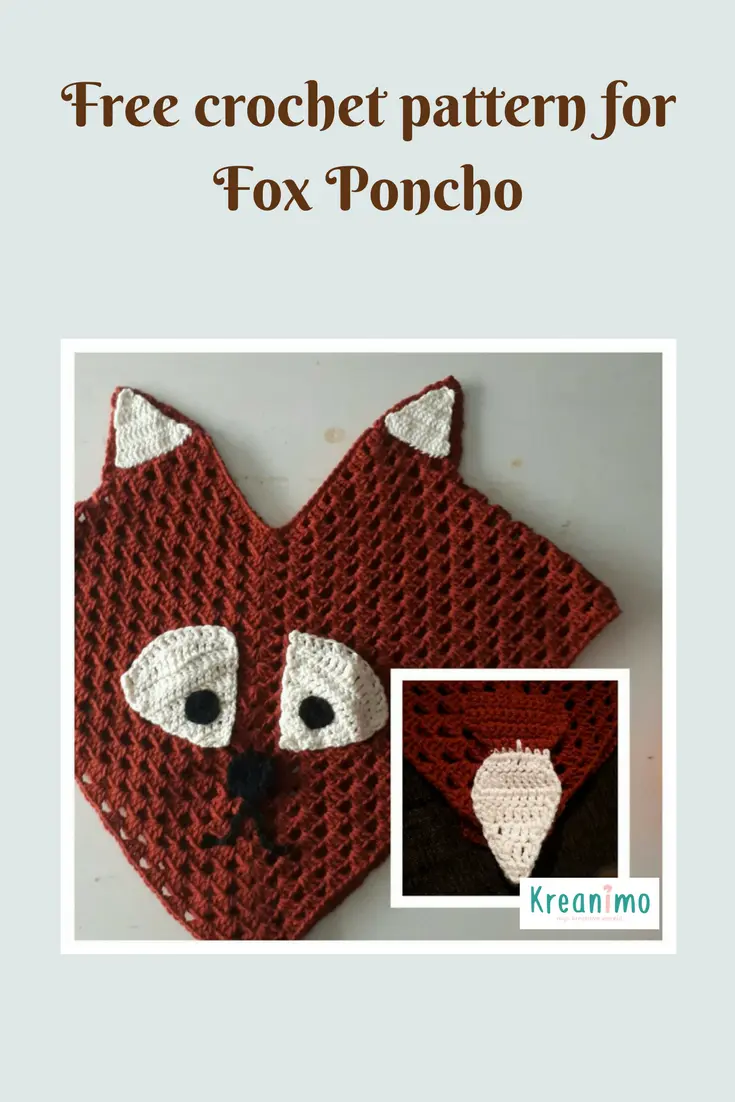
Pin for later:
Happy crocheting
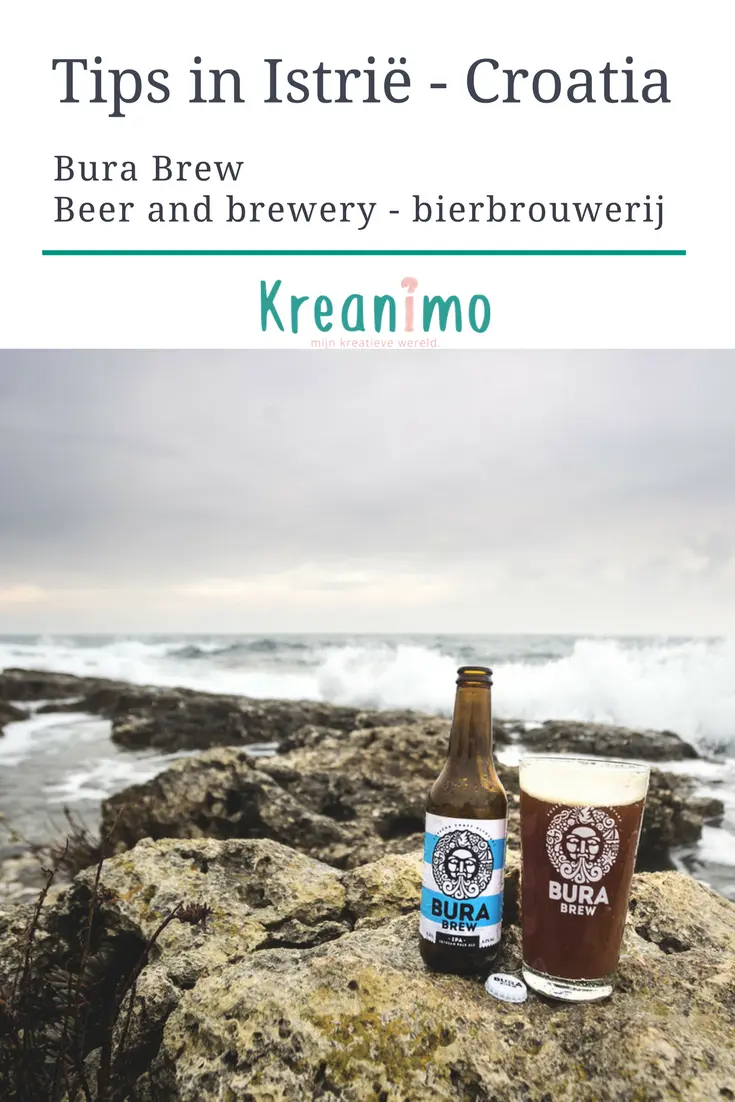
Brewery Bura Brew in Porec: Tip in Porec, Istria, Croatia
My husband is a true Belgian beerlover. There is no doubt about that! When we were in Macau we spent a Sunday afternoon tasting beer at the so called Beer Temple. The kids were playing video games and the local pizza place delivered over there … It was a fun afternoon tasting and laughing with the colleagues over there.
In Croatia, as always, when we’re on holiday, he tried to taste some local beers. Sitting on a sunny terrace in Porec he ordered one. Looking at the label on the bottle and using Google he found out that brewery Bura Brew was right in the same village that we were staying at. Driving back to the campsite, we took a little detour and that’s how we arrived at the little Croatian brewery Bura Brew on one sunny afternoon on holiday.
Visit brewery Bura Brew
My husband really wanted to go over there when he had found out that the brewery was so close to our campsite. The GPS sent us to an industrial part of town and there we found the brewery and we ringed their bell.
A nice lady opened the door and welcomed us in good English. My husband explained he had tasted their beer just a few hours ago and and really wanted to visit because we were staying in Porec and the brewery was right there.
We got a little tour and Veronika (the lady) explained about ‘their’ brewery Bura Brew and their team. The Brewmaster is Claudio. Allesandro, Viktoria’s partner, is the co-founder and he is the sales and marketing guy. Veronika is the one who does all the paperwork and handles all that has to do with money.
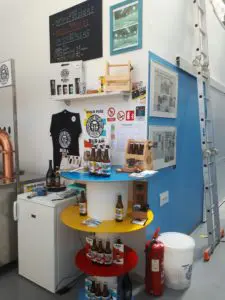
At that moment they had three beers for sale in bottles at their brewery. There was a fourth one (the green one) that wasn’t for sale in a bottle yet, but some bars had it already as a draught beer!
At the brewery there were two big fermenters of 1000 liters and 3 little ones of 500 liters when we were there. Veronika said they could brew 1000 liters a day. 500 liters in the morning and 500 in the afternoon.
When I told her we were Belgians she said that we must have seen so much bigger breweries… “Ours is so small!”
Every bottle has been through their hands and is closes with a little machine!
The one with the hint of Belgium.
They have had a limited editions with Belgian yeast. It’s the bottle on the picture, left of the black T-shirt. The beer sold out! I think it must have been a great beer if it sold out, right?!
So what beer can we buy at brewery Bura Brew?
These are the beers we tasted – my husband gives you some more info:
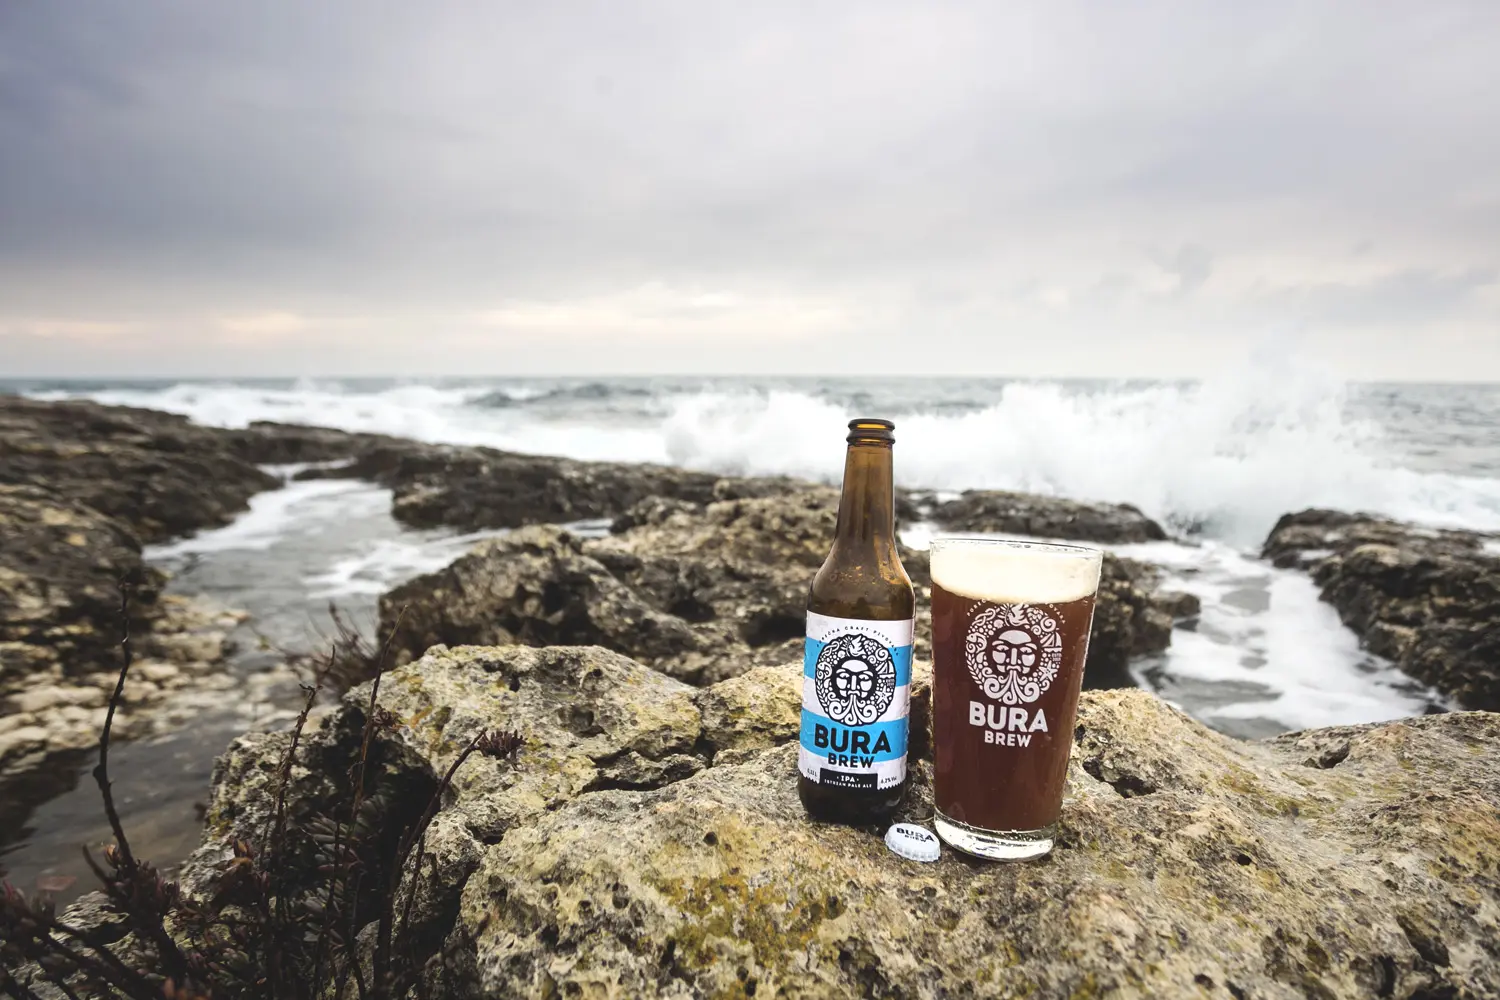
Opitimist Golden Ale – Yellow label: light beer with a hint of hop in the aftertaste.
Redsand Amber Ale – Red label – Irish Ale: a more malty taste with a sweeter aftertaste
Tornado IPA – Istrian Pale Ale – Blue label: IPA with Istrian hop: Very hoppy and light bitter aftertaste.
Why brewery Bura Brew is called BURA?
Bura is the tropical wind that’s typical of the Adriatic sea. The brewers want to link their beer to that wind: cool and refreshing, but also to the sun and the sea.
We loved our little visit to brewery bura brew. We felt welcome! If you are a beer lover and you find yourself near or even in Porec on holiday, you really should visit the three brewers and taste their beer!
I’m really curious to see what this beer will achieve in the future!
We went back to the brewery two times during our stay in Porec to get some more stock. One time for ourselves to drink at the campsite. One time just before we went back home. We really wanted to take some bottles back home for some people who really love beer…
At our second visit they were putting beer in bottles. Our son was very intersted in the little machine. There was the proof that every bottle goes through their own hands.
We really wish these young brewers all the luck and once again: if you are nearby and you love beer… make a stop over there!
Yay! Thursday and so it’s Crea-cross time.
This week’s prompt is Loud! I’m so curious what you will all come and link! I made a windchime for my terras this week!
Loud… what was I thinking?
So, vlogging isn’t really my thing, so what was I thinking when I put this challenge onto the list? How can you draw ‘loud’.
Crocheting ‘loud’ isn’t really possible, is it?! I was a bit angry with myself, but hey it’s a challenge, isn’t it?!
Windchime
Than my eye fell on the windchime in my kitchen. It’s the most stupid place for a chime, there’s never any wind and so it makes no sound.
My sister has a large windchime on her porch with bamboo sticks. It makes lots of noise when the wind blows. I love that sound, it is very relaxing. In our student home we had a smaller chime near the window, that one made a lovely tinkling sound.
Cleaning out our old garage at the back for the party of my son in a few weeks, I found those little terracotta pots. Maybe I could turn those into a self-made chime?!
In the craftroom
I duck into my craftroom (ahhh, still love the sound of being able to say that!) and foudn the right colors acrylic paint and some wooden pearls of the right size.
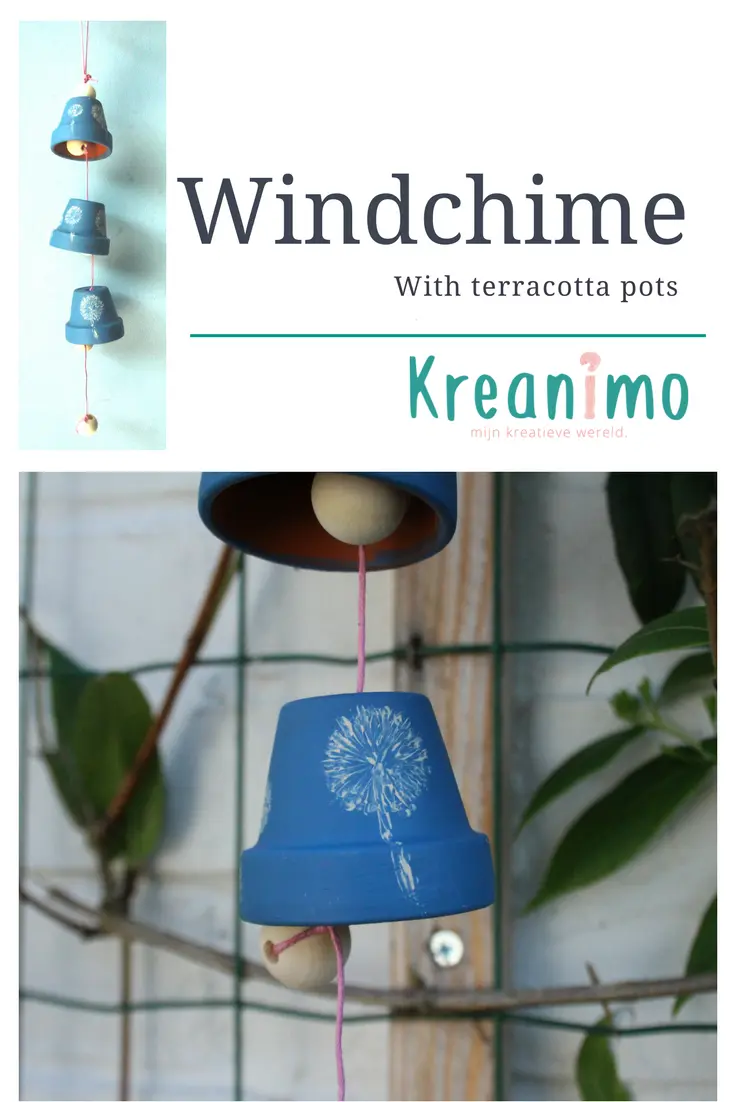
Windchime DIY
Supplies:
3 terracotta flower pots ( I used small size!)
acrylic paint in a darker and a ligher color
bruches
yarn
(wooden) pearls
Step by step
paint the terracotta pots with some layers of the dark color
let it dry
paint the dandelions on the pots with the lighter paint when it’s dry
put the pots and the pearls on the string
hang your windchime
Co-host
This week Esmeralda of Save The Mama is my co-host and she did some handletter paintings! Go and take a look!
Books
Next week’s prompt is books…. but for now: go loud!
It’s Crea-Cross time again! The weekly creative linkparty for all creative people to show what they are up to! This week my kids did a print the sea project by using old platic freeze bags. It’s a great ‘bad weather’ activity that they will love! Trust me!
Patricia
Today my co-host is bij Patricia and I’d love you to take a look at her blog too. I’m very curious to see what she did!
Use old plastic bags
I don’t know about the rest of the world, but getting a plastic bag when you are shopping or buyin groceries is rare here in Belgium and the Netherlands.
Fabric bags or shopping bags that can be used more than once are much better off course.
I often use cardboard boxes too.
Some people use plastic bags to crochet things with.
I even know somebody who washes freezer bags to use them again, I just don’t know if it’s such a good idea to do that food safety wise. 😉
If you use plastic freezer bags and if you don’t want to throw them away immediately, you can use them to do some printmaking with your kids!
Print the sea
The idea of using plastic bags to print is nog mine! Alisa Burk has a lovely blog post in which she explains how to do this.
supplies:
paint
brushes
old plastic freezer bags
water jar
plate
protection for your table
pictures of fish for little children.
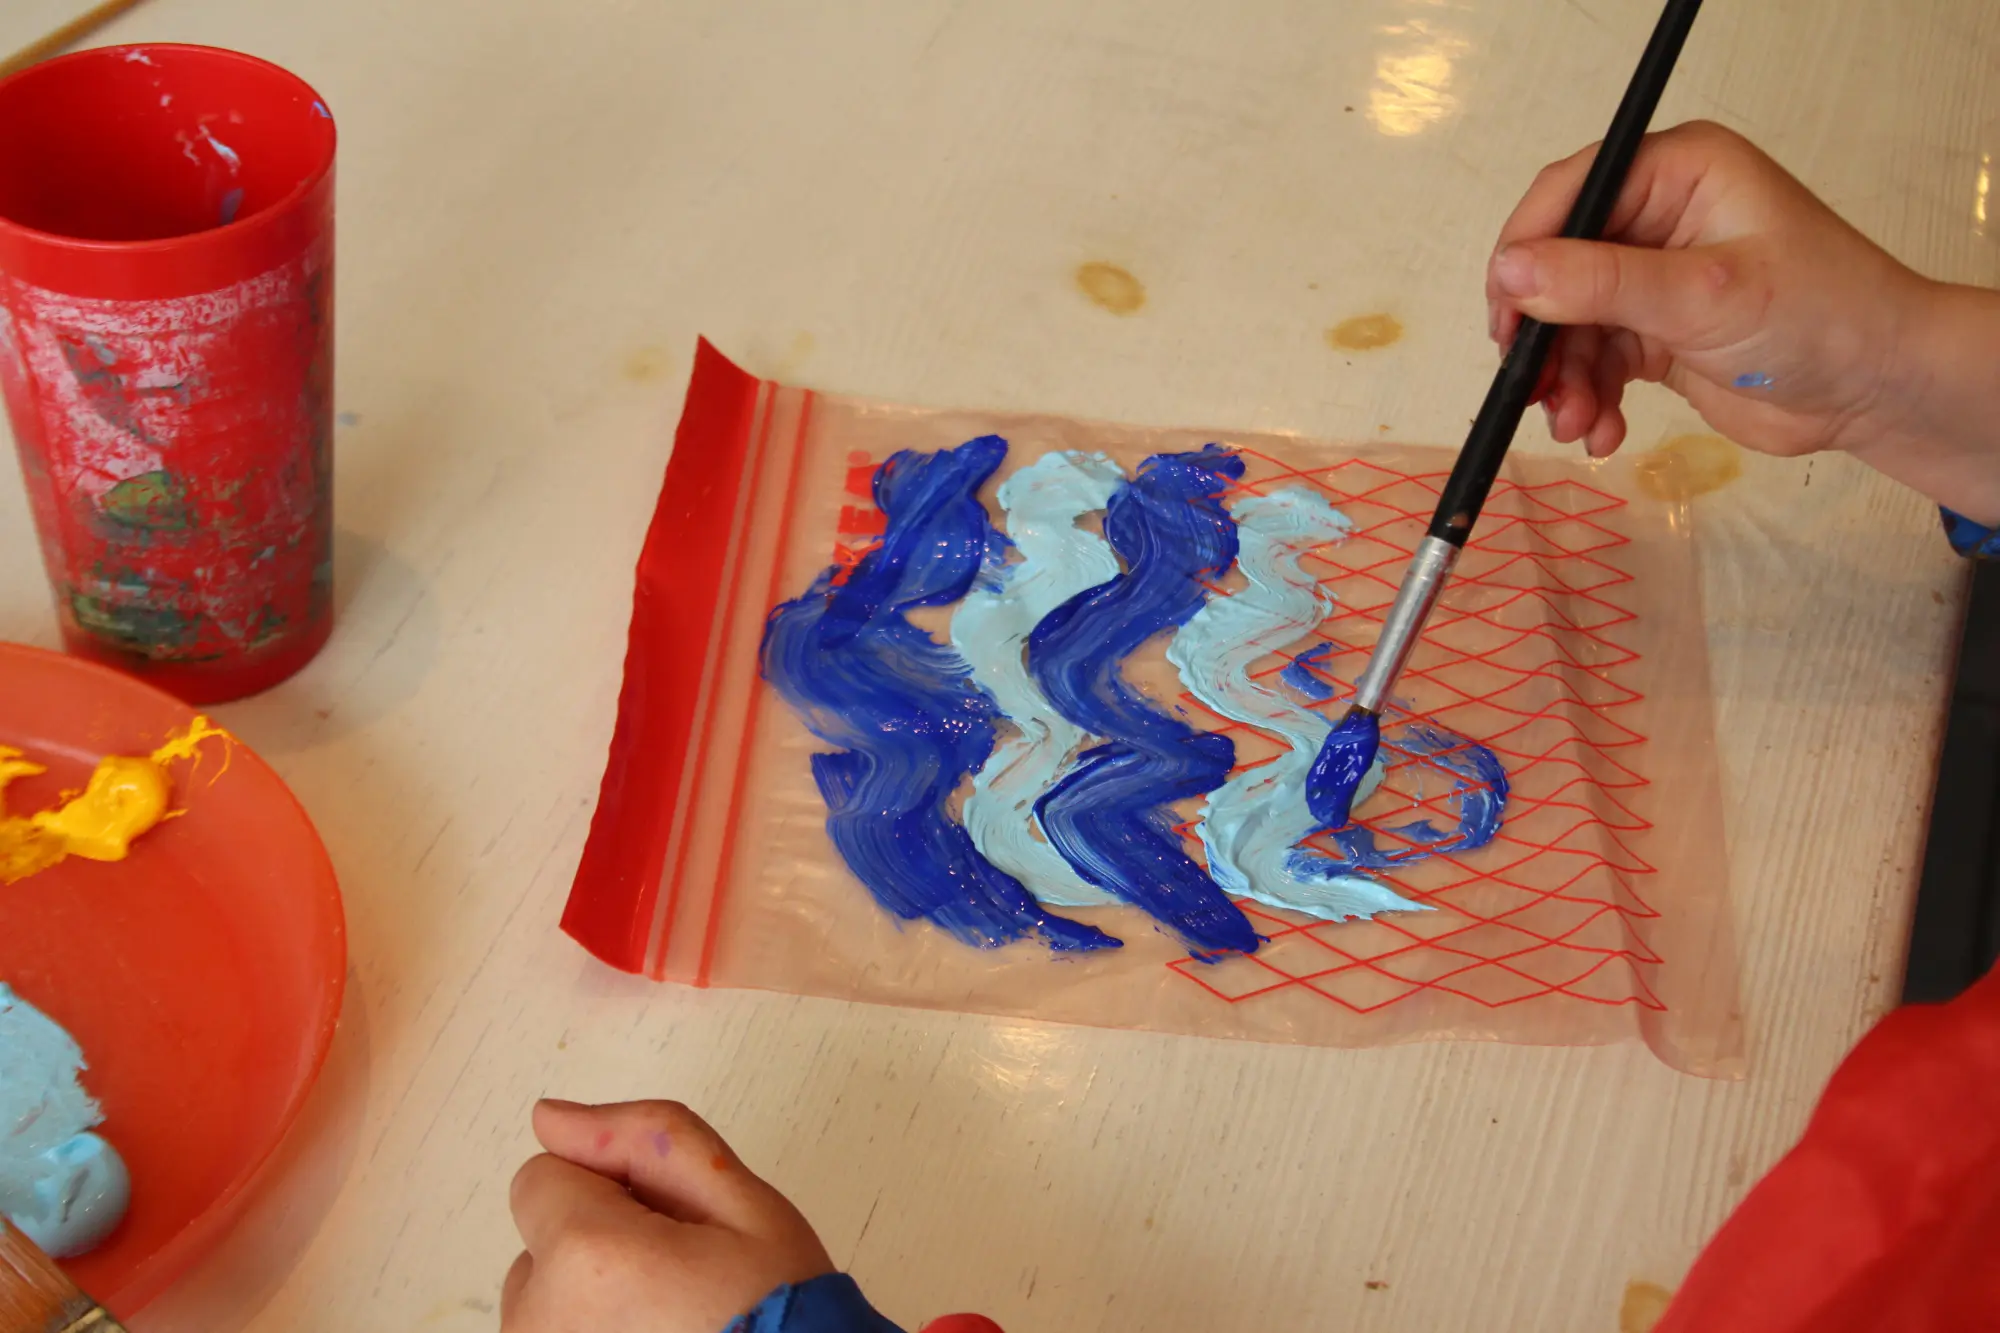
Print the sea with paint
Let the kids use different tints of blue to paint wavy water lines on a bigger plastic bag. Beware that the bag is not larger than the paper you are going to use to print on. Try to make sure that they spread the paint well. That makes the print more like the painting on the bag.
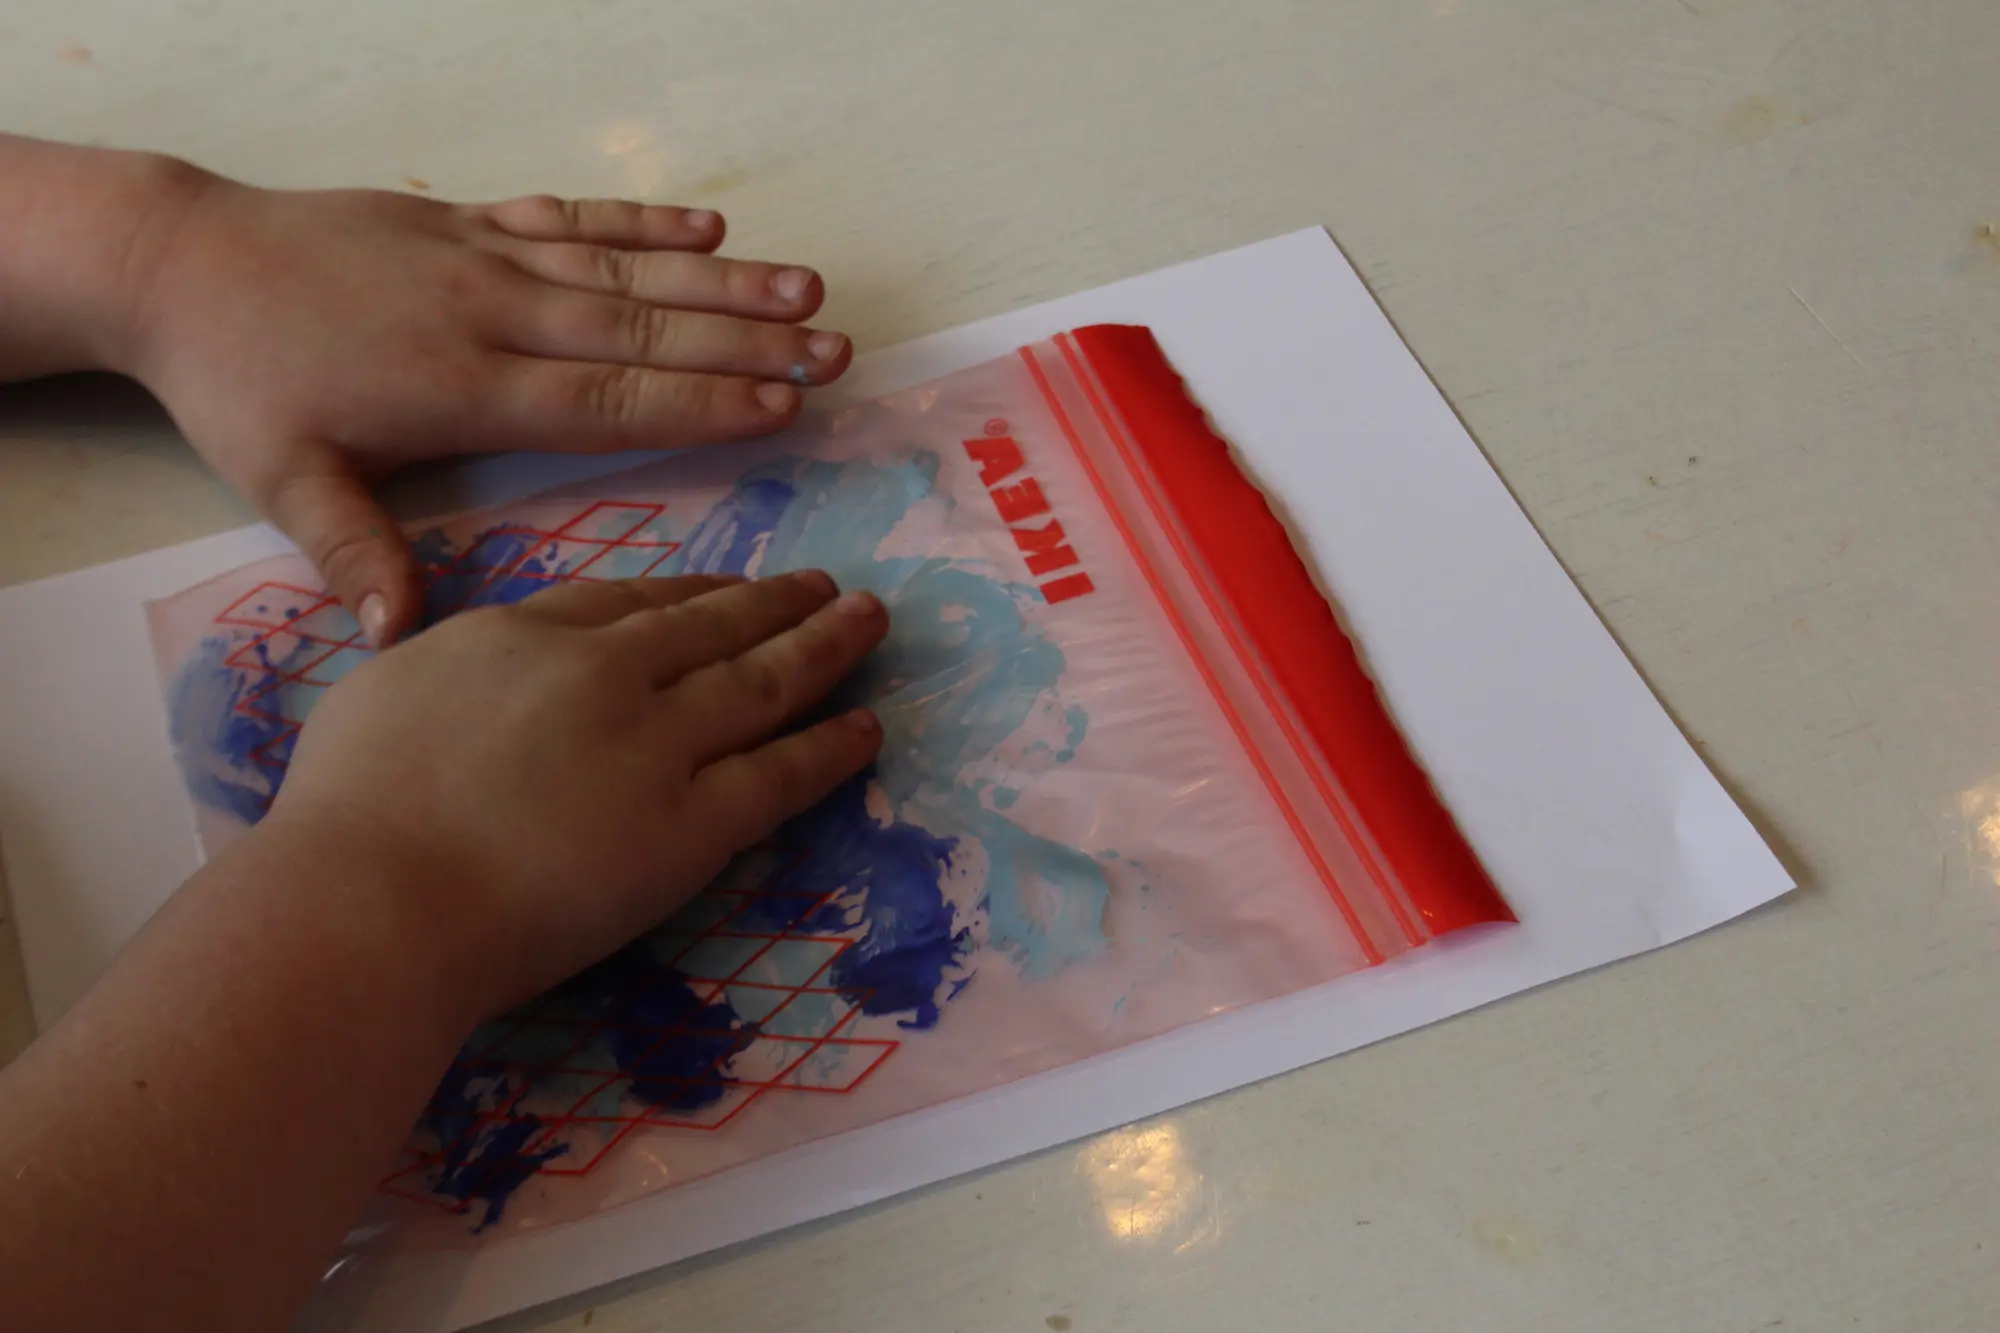
Put the bag with the paint on the sheet of paper en let them push with their hands on the bag.
Pull off the bag and let the print dry.
If there is still alot of paint on the bag, you can make a second print!
Make sure the paint is dry before you go to the next step!
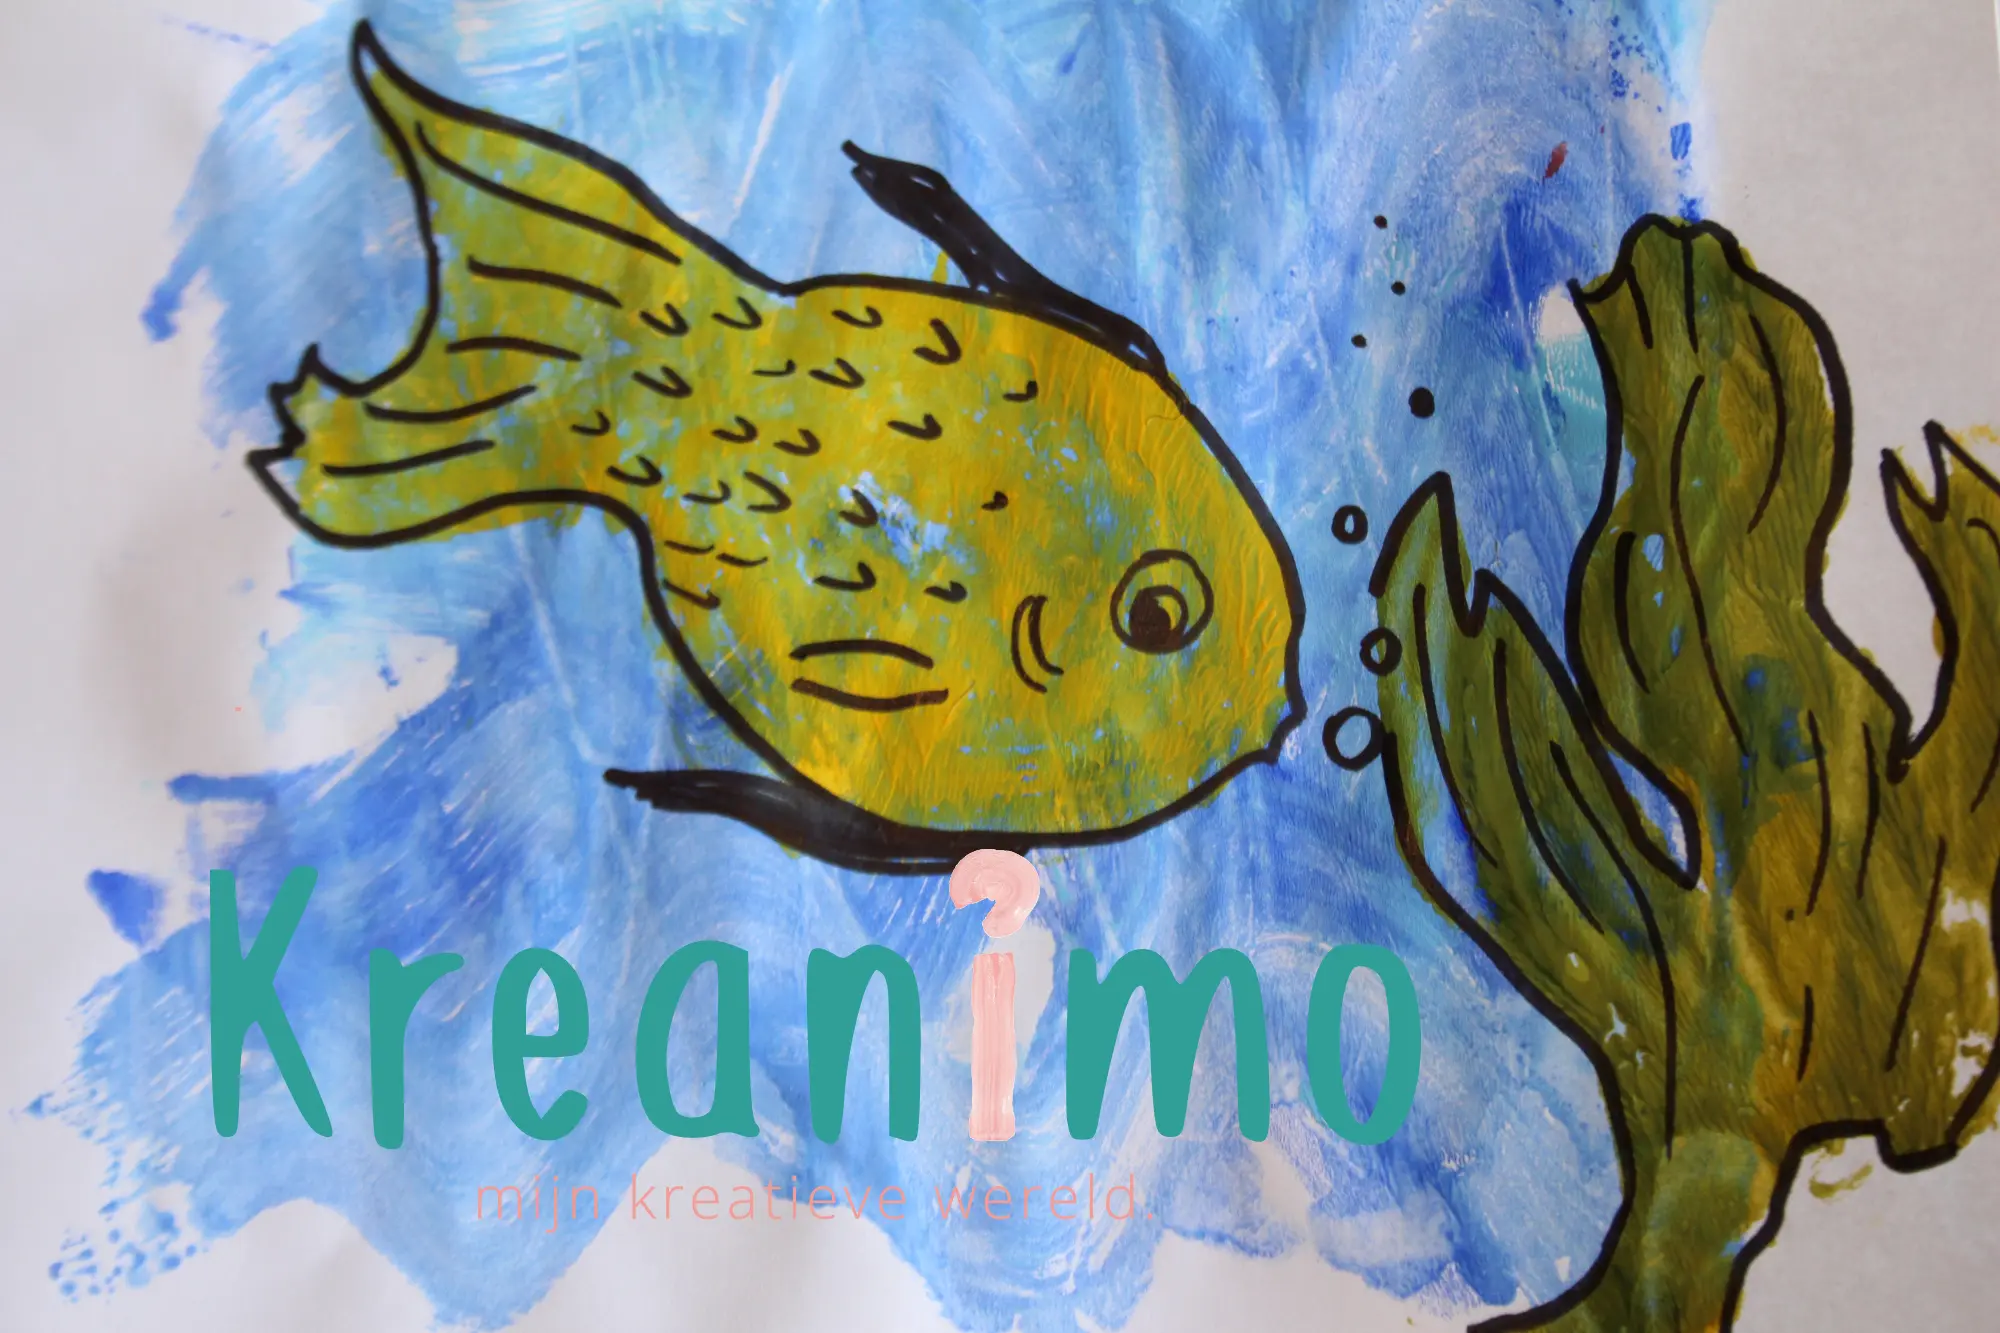
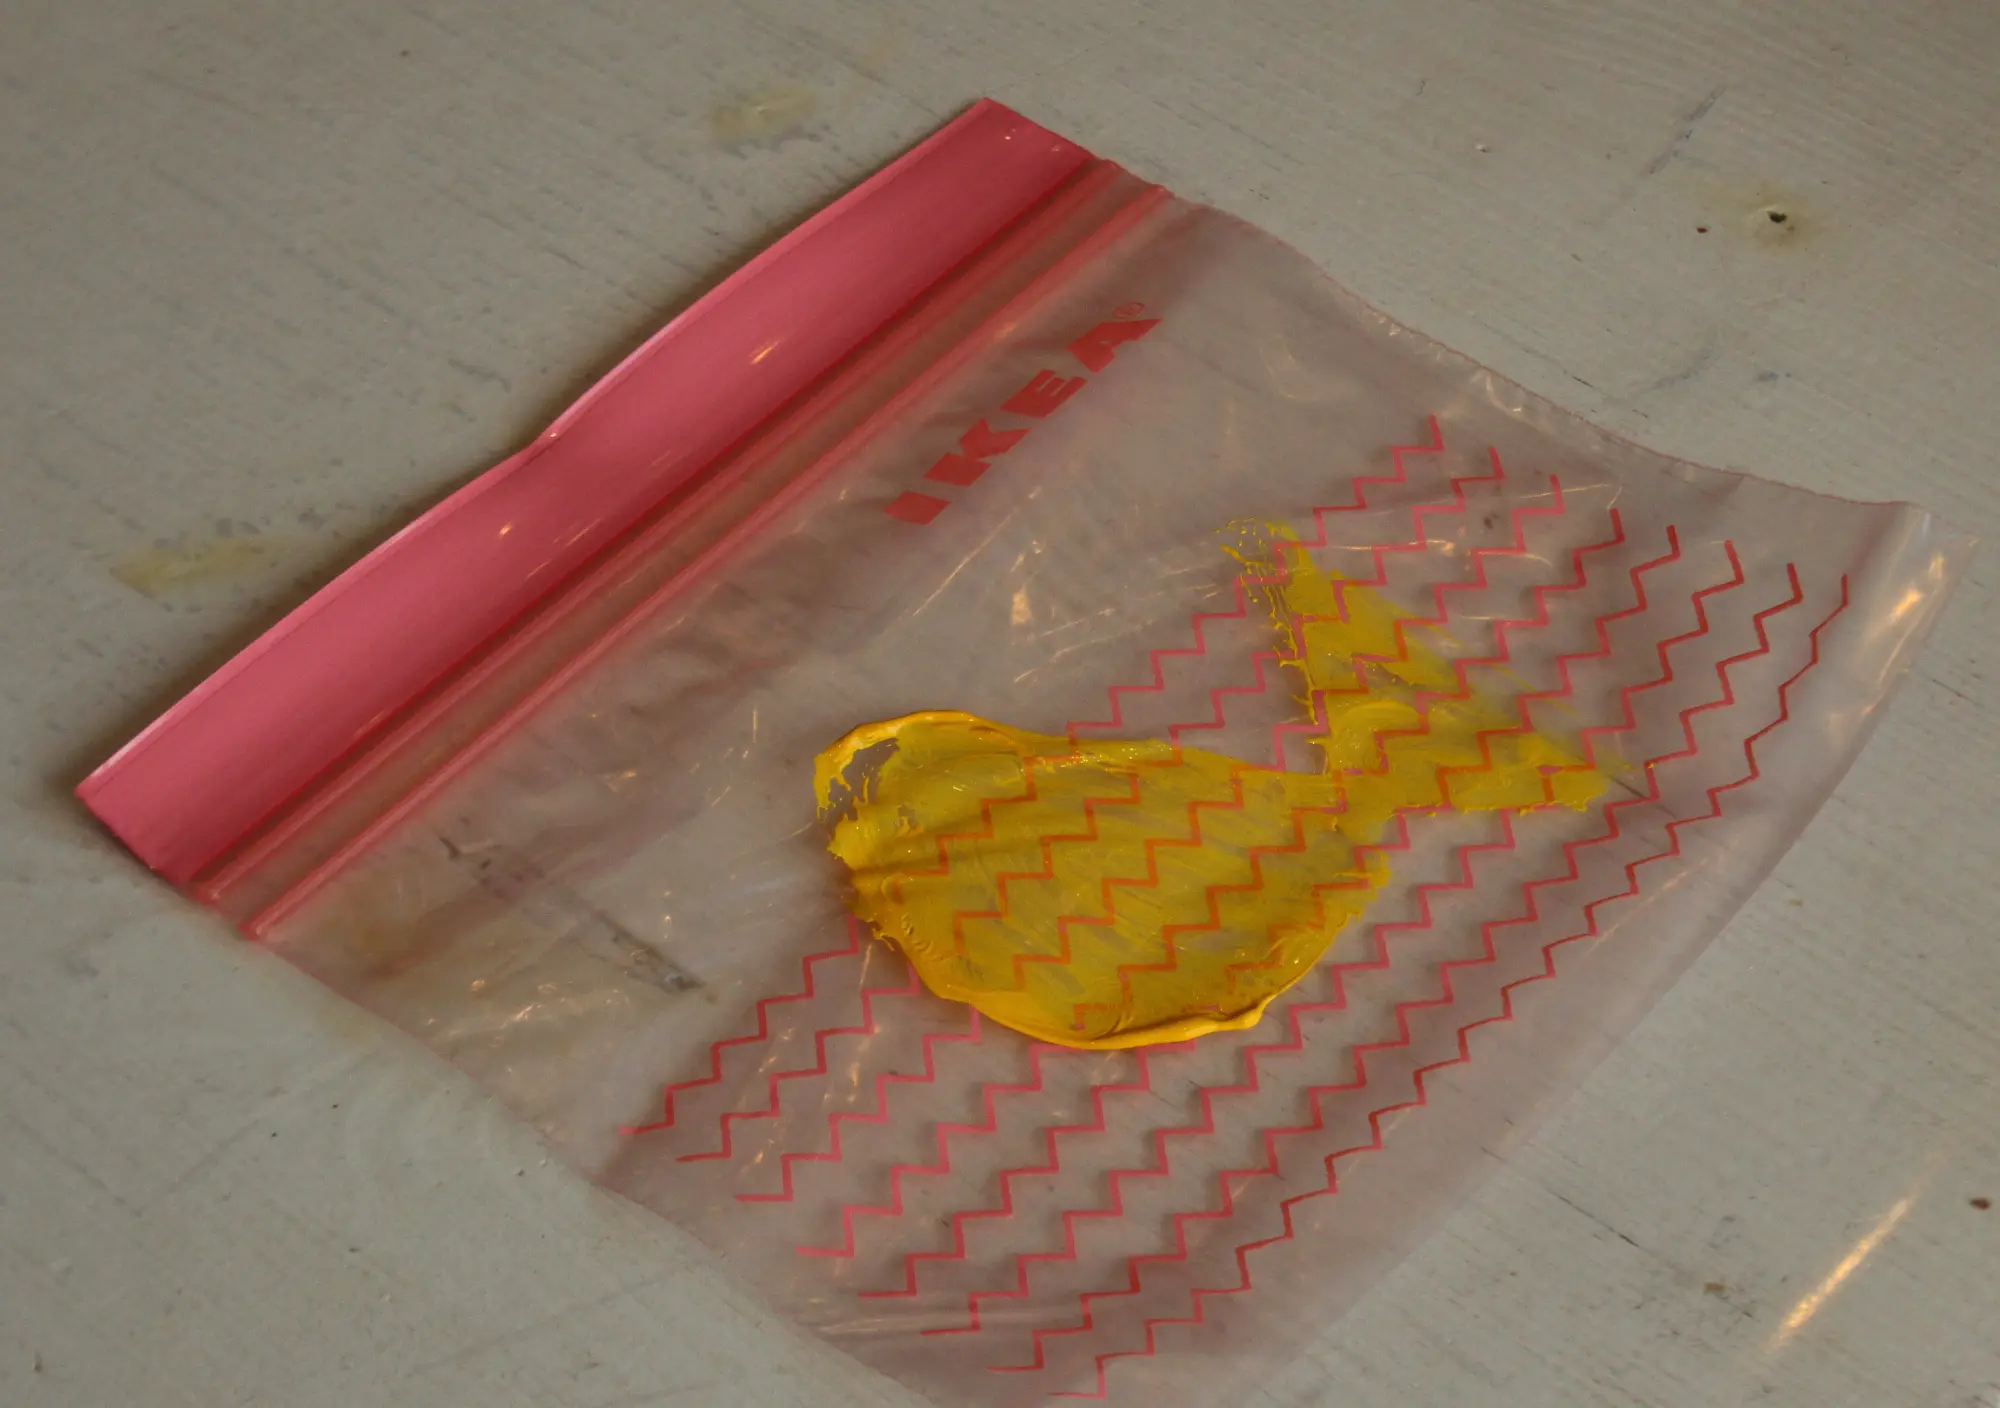
Under water world
Let the kids paint little fish or plants on smaller bags and let them print on the dried wavy blue prints you did earliers.
Fish can swim in all directions, plants can brighten things up. Let the kids use their imagination.
Let it all dry again!
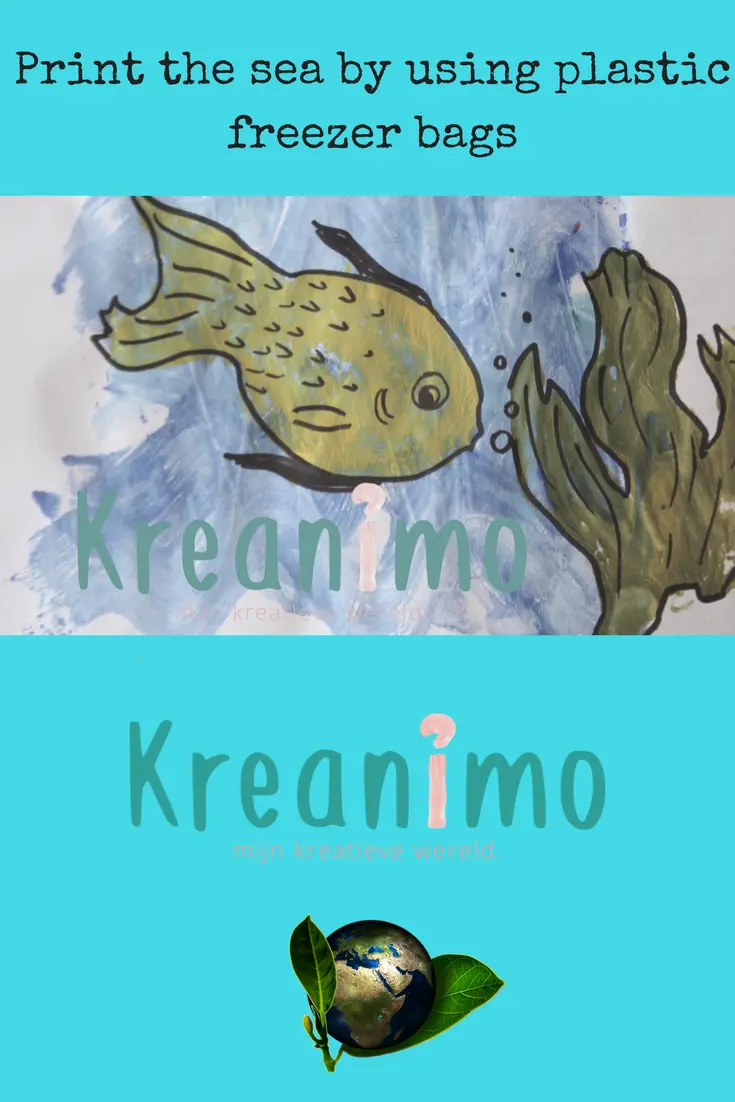
Details
With markers details can be added when the paint is completely dry!
Pin for later:
Next week.
The prompt next week is ‘broken’. Not that easy, but maybe you can put your recycle hat on! Hope you have a lot of fun with this weeks prompt ‘Blue’. Don’t forget to link your blue projects in the linkup beneath!
Have a nice week!
Hey, nice of you to drop by for this week’s creative linkparty. The theme is ‘shadow’ and I’m curious what you all will link to this ‘not so easy’ prompt!
Or maybe you just found the Star Wars Lego DIY picture and came looking how I did this. However you got here: welcome!
How does Crea-Cross work?
If you already know this part, you can skip to the next title. ?
Every week I give you all my interpretation about that week’s prompt. This week, that prompt is ‘Round’
At the end of this blogpost you can find a linkparty.
There you can link up to 2 of you creative interpretations to the challenge.
During the week you should visit two (or more) other people who linked and leave a nice comment.
If you would like to join the Pinterst board of this Crea-Cross board project, you can send me an e-mail with a request.
If you share on social media, please use #creacross.
On instagram I’ve opened a Crea-Cross acount to share all your contributions to the linkparty.
By joining you give me the permission to share your post’s pictures on social media with credits to you.
The others:
Every week other bloggers co-host crea-cross with me, so be sure to check their blogs out!
This week Esmeralda, blogger at Save the Mama will join me, so be sure to go there for a visit too!
Challenge 5: Shadow
This week is somewhat the opposite of last week. So many party creativity was shared and now we are in the dark shadows!
But shadow can be so beautiful. It can make or break you drawing or your picture.
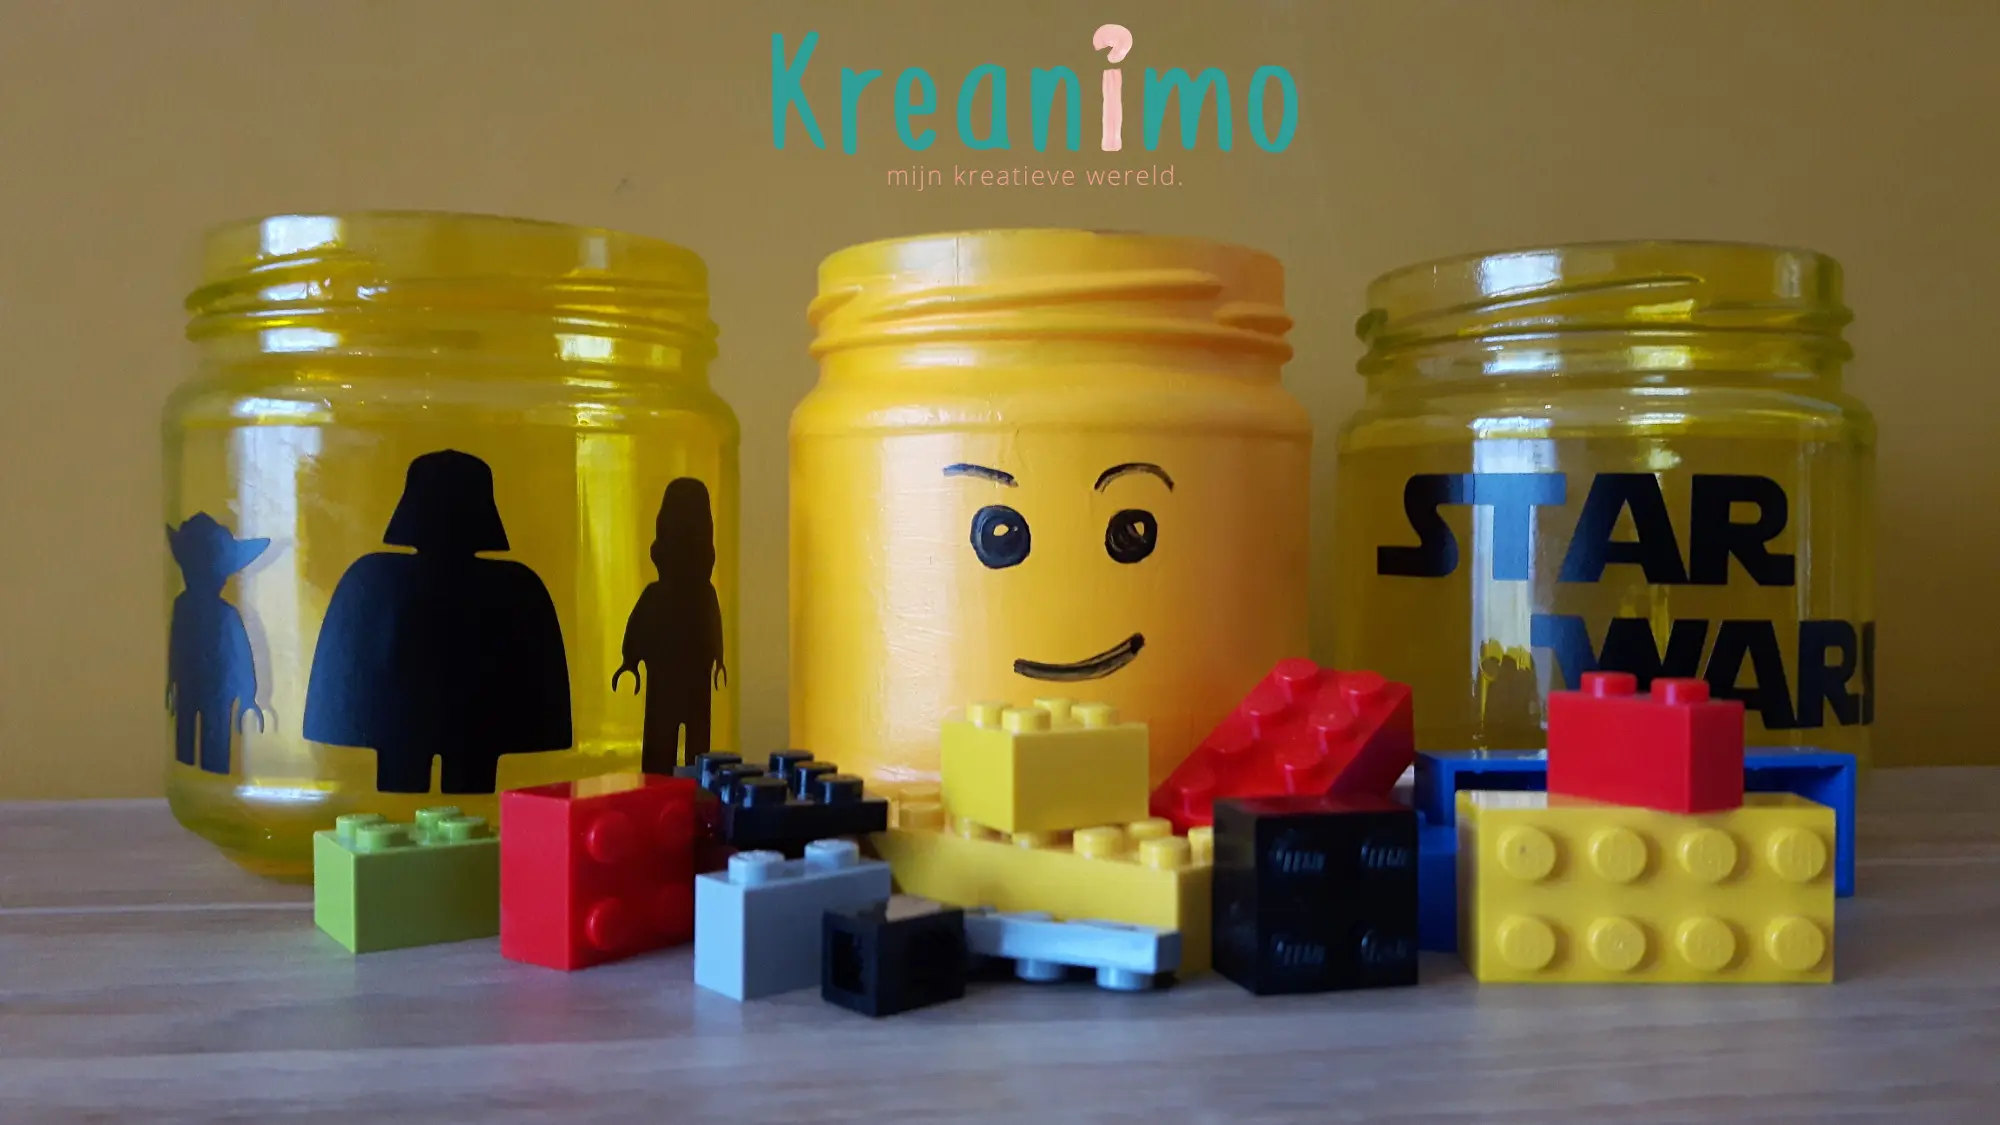
Silhouettes are a sort of shadows. That’s where I got my inspiration for this week.
On Pinterest you often come accross those lego figure heads made of glass jars. I wanted to do something like this, but with a twist.
That’s how I got to this Star Wars DIY decoration.
Black stickers to cut with the cutter**
* Or a friend who lend you the cutter.
** Or a leftover from the same friend who lend you the cutter machine 😉 (That’s what friends are for!)
Step by step Star Wars DIY decoration
Wash the labels off the jar.
Degrease the inside of the jar
Put a little glass paint into the jar, close the lid and shake so the paint can spread.
Let it dry
Stick the cut out figures on the outside
Repeat all the above steps for the next jar
Paint the third jar with acrylic paint, but make sure you mix it with some detergent. The paint will stick better!
Let it dry
Draw the face with a black permanent marker on the jar.
You can use the transparant Star Wars DIY decoration as candle holders. Beware, with children you better use battery candles.
This website uses cookies to improve your experience while you navigate through the website. Out of these, the cookies that are categorized as necessary are stored on your browser as they are essential for the working of basic functionalities of the website. We also use third-party cookies that help us analyze and understand how you use this website. These cookies will be stored in your browser only with your consent. You also have the option to opt-out of these cookies. But opting out of some of these cookies may affect your browsing experience.
Necessary cookies are absolutely essential for the website to function properly. This category only includes cookies that ensures basic functionalities and security features of the website. These cookies do not store any personal information.
Any cookies that may not be particularly necessary for the website to function and is used specifically to collect user personal data via analytics, ads, other embedded contents are termed as non-necessary cookies. It is mandatory to procure user consent prior to running these cookies on your website.